
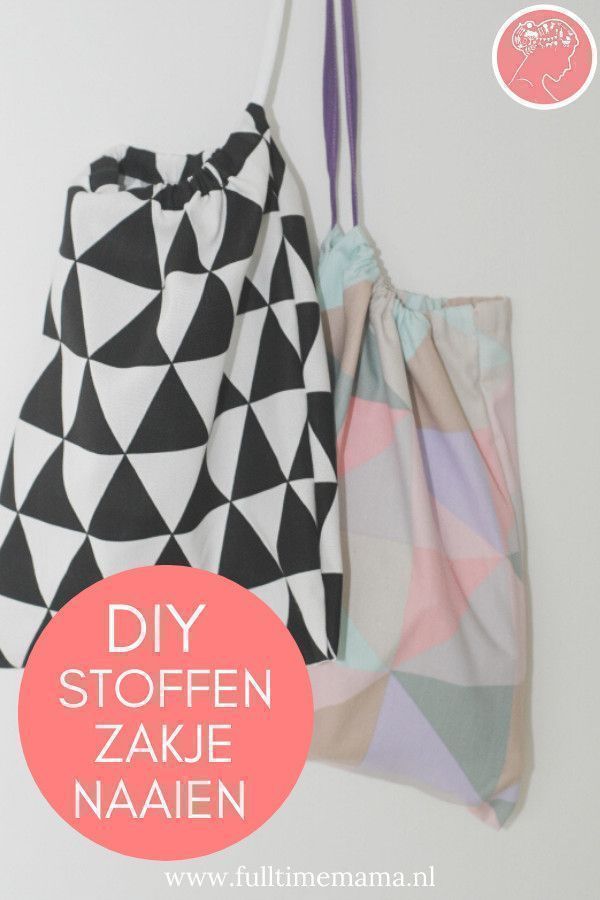
DIY Simply sew a bag of fabric
My kids are pretty spoiled. They have a lot of toys but also a lot of the same ones. The structure in me likes to keep everything organized.
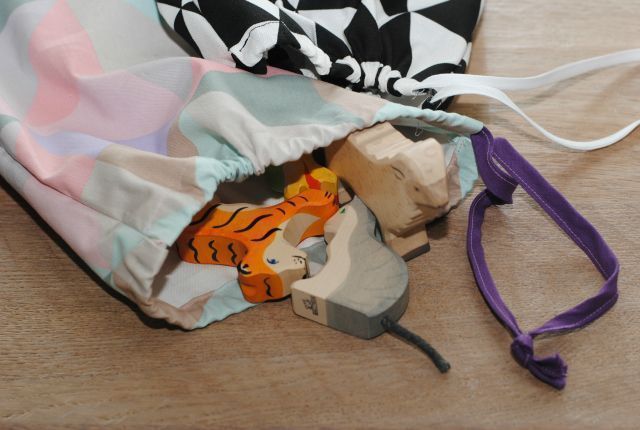
All LEGO together, all horses together and all wooden figures together. So for this last one, I wanted to sew a fabric pouch in a simple way. To keep the Holztiger figures neatly together.
DIY; Simple fabric bag sewing
I had some left over fabric from other projects, which were perfect to do something nice with. As our collection of wooden figures from Holztiger keeps growing, the plan was to sew a fabric bag. This way the children can easily hold the figures together and take them to grandma, for example.
I gathered my stuff and got to work.
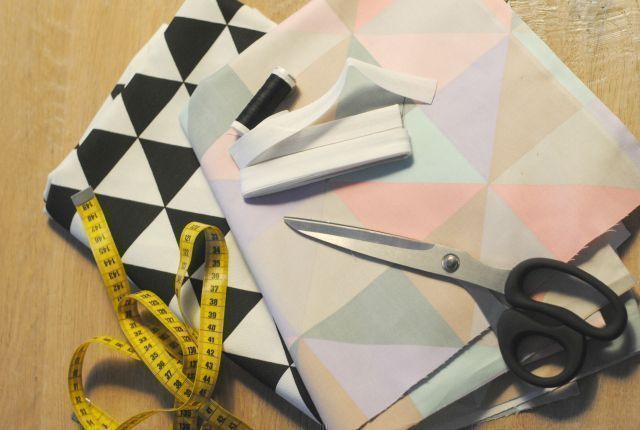
What do you need to easily sew a fabric pouch?
- 50cm cotton (for 2 squares of 40x25cm)
- bias tape, ribbon or string
- scissors
- tape measures
- yarn
- sewing machine
How to sew a pouch of fabric?
At the Kwantum I bought a few pieces of cotton of 1 meter. For 5 euros a meter you can make lots of nice things. I had the bias tape and yarn at home.
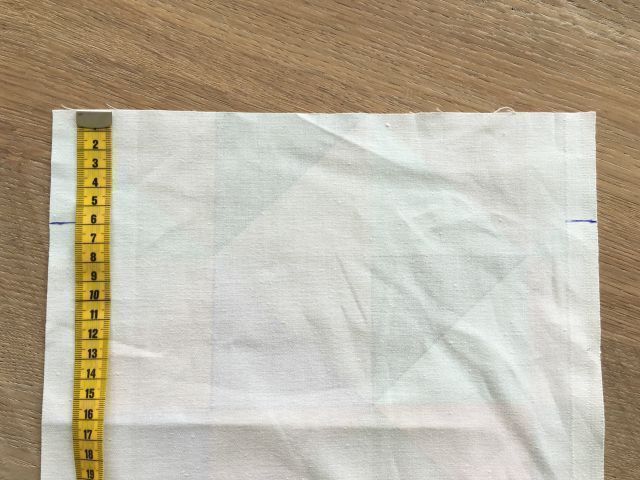
Fold the fabric in half and measure a rectangle of 25 centimeters by 40 centimeters. Cut this in half so you get a long rectangle of 80 centimeters by 25 centimeters.

On each narrow side of your rectangle make a mark 6 centimeters from the top. Do this on the back of the fabric so you won't see it when the pouch is finished. Keep this line while assembling the bag.
On this line will also be the edge of the hem for the cord.
Fold your rectangle right sides together. Make sure all the edges line up so your pocket is straight. Now pin the sides together to the line you marked.
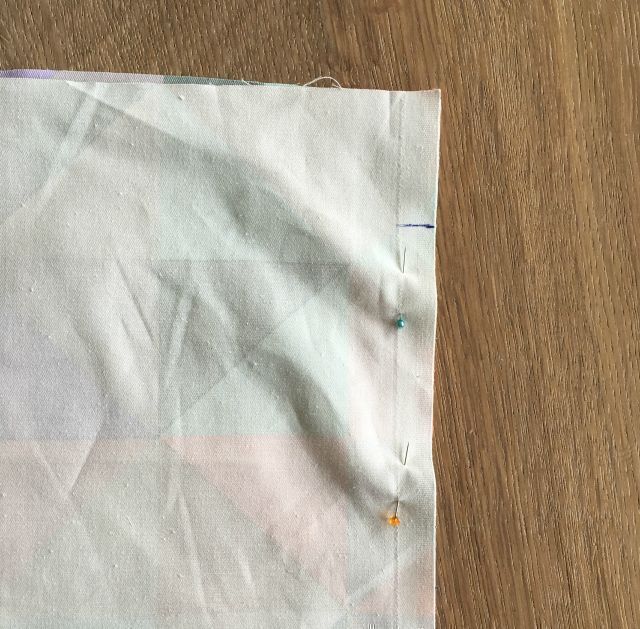
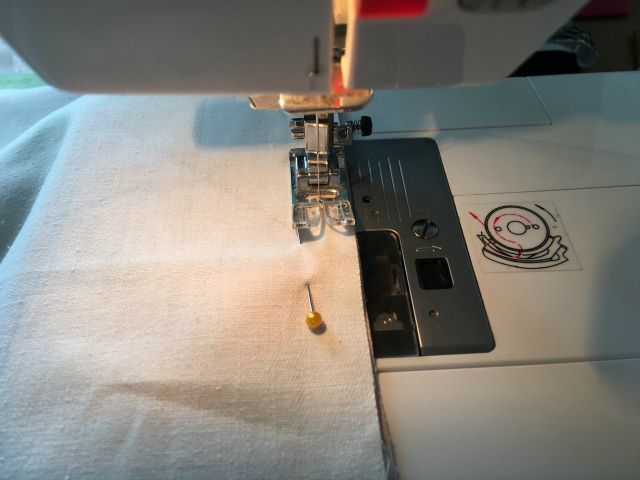
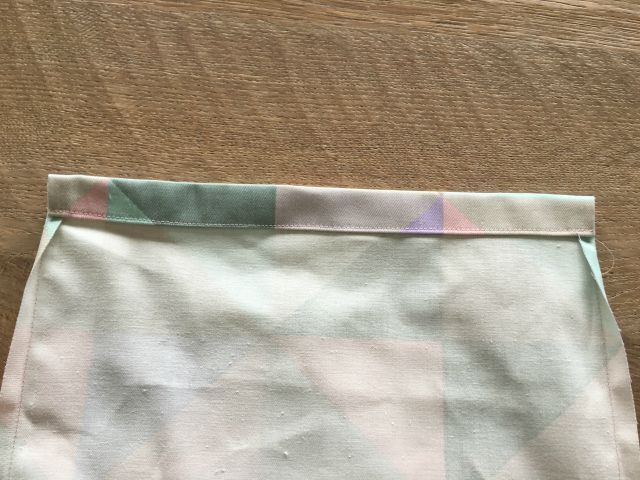
Do this on both sides. Next, sew the side seams closed under the sewing machine with a straight stitch. You start at the marking and stitch all the way down.
The top 6 centimeters remain open.
If all goes well, you now have both side seams stitched together. You now have two flaps of 6 centimeters at the top. Fold these two times inwards to create a tunnel.
You fold the fabric once at 2 centimeters from the edge. Then fold the fabric again until you reach the mark. Iron it well so the fold is in place.
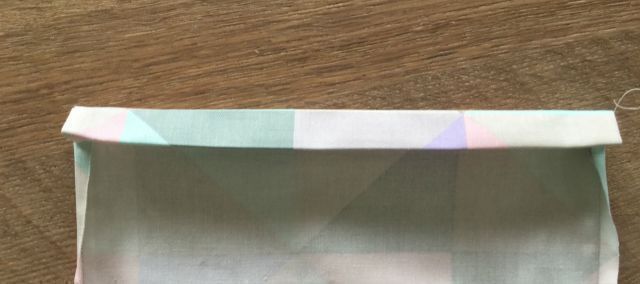
If you have ironed the tunnel on both sides then stitch it in place with the sewing machine right along the bottom edge. This creates your tunnel through which you will later put the cord.
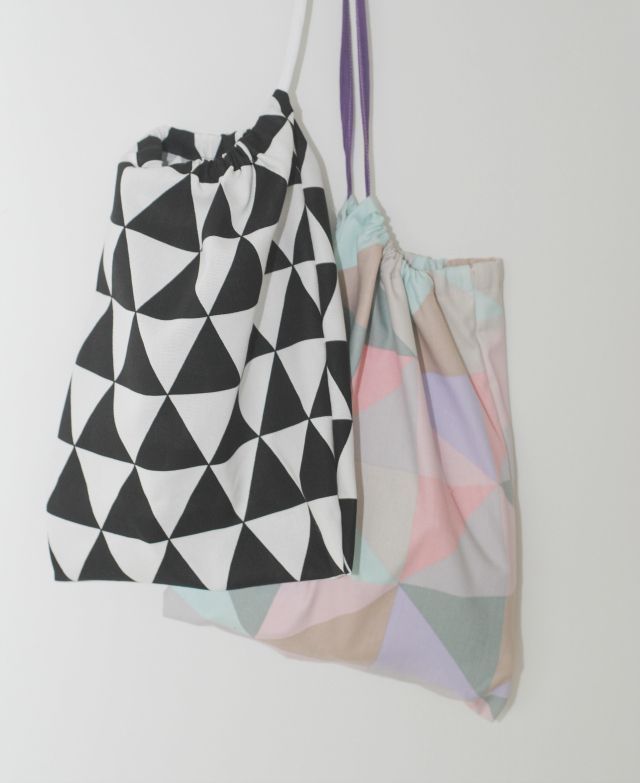
And then the big moment is there. Turn your pocket inside out et voila, you just made a pocket out of fabric. Baste with a cord or ribbon and you are ready to clean up your toys.
Handy for animals, marbles or LEGO!
What would you keep in this bag?

♥ ♥ ♥ Full -time mama uses affiliate links. This Means That If You Click On One Of The Left, We May Get A Small Commission On It. It Doesn't Cost You Anything Extra, But It Benefits Us.
With thesis Processed We Can Maintain This Website.
Also, sometimes we get paid for an article or we get a product in exchange for a blog post. As a result, our opinion remains unchanged and honey. For More Information You Can Read Through The Disclaimer. ♥ ♥ ♥